You down with SSD?
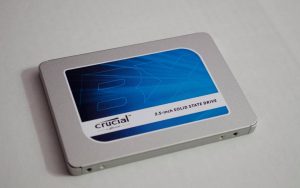 Solid State Drives (SSD) have become the standard for speed and reliability as people upgrade from the traditional Hard Disk Drive(HDD). Mainly because as opposed to the HDD, there are no moving parts, making it easier for the computer to read from it. When you run an SSD, you will need to know how to configure it for best performance. This is because the more you read and write to an SSD, the quicker the space available for data dissipates. You will have probably noticed by now that flash drives seem to have this problem. This is because they are just another variant of SSD Today, I’m going to cover the settings that will need to be in place to protect your drive, in a Windows environment. If your Google-Fu is strong, you might be able to find the linux and MacOS equivalents of these.
1. Enable AHCI
The Advanced Host Controller Interface (AHCI) is a feature for ensuring that Windows will support all of the features that come with running an SSD on your computer, especially the TRIM. TRIM allows Windows to help the SSD perform a regularly scheduled garbage removal. This is what its called when a Hard drive goes through and removes data it no longer needs.
2. Enable TRIM
We’ve talked about TRIM enough in the previous section, so let’s enable it.
- Open your Command Prompt, by pressing ÿ+R on your keyboard.
- Type “cmd” and click “enter.” Type the following
fsutil behavior set disabledeletenotify 0
Alrighty, Now for the next step!
3. Disable System Restore
System Restore is one of the Windows memory wasters. As mentioned before these will wear down on memory over time, as well as overall take up space you’ll probably never use. If you really need a backup solution, I would suggest using an external drive or Cloud storage.
- Click your Start menu, right-click “Computer>Properties>System Protection” on the upper left-hand corner:
- Once in the window, click “Configure>Turn off system protection>OK.”
4. Disable Indexing
A solid chunk of your SSD speed is consumed in indexing files for Windows search. This could be useful if you store everything you have on your SSD, but you might be annoyed by it if you experience slow-downs due to the periodic indexing process that occurs every time you add new data to the drive. You’re better off without it in an SSD, because the speed boost from the indexing process is superfluous in such environments.
TL;DR; Indexing, will not only slow performance but the constant rewriting of paths, will kill memory availability.
- Click your Start menu and click “Computer.”
- Right-click your SSD and click “Properties.”
- Uncheck the box labeled “Allow files to have contents indexed in addition to file properties”
- Click “OK.”
Once you do this, the OS will apply this to all the files and folders on the drive. If a dialog prompt comes up telling you that it couldn’t remove a file, click “Ignore All.” That will speed up and automate the process ignoring any errors.
5. Disable Scheduled Defragmentation
When you use a PC and access files, picture a Rolodex and each and every file as a card in the Rolodex. As you open each file or run a function in a program, it brings that file to the front of the Rolodex. Eventually its all out of order. Defragmenting is the equivalent of going through and moving each card back to where it belongs.
TL;DR; A lot of moving files around = loss of space quicker.(I’ve seen an 8gb flash drive drop to 5.4gb capacity after one accidental defragmentation)
- Access your Start menu, click “Accessories,”
- Click “System Tools>Disk Defragmenter>Configure schedule.”
- Once in the schedule configuration window, uncheck the box labeled “Run on a schedule.”
- Click “OK,”
6. Remove The Page File
The page file is like a form of RAM on your hard drive. Disabling the page file on a solid state drive would greatly increase the focus it would have on running system processes. If you have an HDD, Keep this enabled, just running on that Disk.
The easiest process of configuring the page is through the configuration window.
- Right-click “Computer>Properties>Advanced system settings” on the top left-hand side of the window
- Access the “Advanced” tab.
- Click “Settings” under “Performance.”
- Access the “Advanced” tab
- Click “Change.”
7. Disable Hibernation
Usually, it’s about 2gb for the hibernation state.
To disable it:
- Open your Command prompt, by pressing ÿ+R on your keyboard.
- Type “cmd” and click “enter.” Type the following
powercfg -h off
8. Disable Prefetch and Superfetch
 Windows sometimes stores information in your physical and virtual memory belonging to programs that you aren’t necessarily using, but use very often. This is called “Prefetch” and “Superfetch.” If you are using virtual memory on your HDD but still using an SSD, you’re better off just disabling with these two features.
- Open your Registry Editor, by pressing ÿ+R on your keyboard.
- Type “regedit.” and click “enter.”
HKEY_LOCAL_MACHINE\CurrentControlSet\Control\SessionManager\Memory Management\PrefetchParameters
.Set values for EnablePrefetcher and EnableSuperfetch to “0”
9. Configure Write Caching
On many SSDs, user level write caching causes lost memory space.To reach the configuration window,
- Right-click “Computer>Properties.”
- Click “Device manager,” expand “Disk Drives.”
- Right-click your “SSD>Properties.”
- Select the “Policies” tab. In this tab, you’ll see an option labeled “Enable write caching on the device.”
- Un-check that option, click”OK.”
10. Disable Services for Windows Search and Superfetch
Even with the above-mentioned registry fixes and index removal, your computer might still slow down your hard drive with the corresponding services.
- Open the services list, by pressing ÿ+R on your keyboard.
- Type “services.msc” and click “enter.”
- Find both Windows Search and Superfetch, and disable them.
11. Disable ClearPageFileAtShutdown and LargeSystemCache
Windows is quick to implement things that are no longer necessary. Since SSD operates on flash memory, making it possible to easily overwrite things on the disk, the page file doesn’t need to be erased while the computer’s shutting down. This will make the Windows shutdown process a load faster. LargeSystemCache, on the other hand, exists primarily in Server versions of Windows and tells the computer whether to use a large cache for pages on the drive.
Both of these options are found in your registry editor under
- Open your Registry Editor, by pressing ÿ+R on your keyboard.
- Type “Regedit” and click “enter.” Type the following
HKEY_LOCAL_MACHINE\CurrentControlSet\Control\SessionManager\Memory Management
Set values for ClearPageFileAtShutdown and LargeSystemCache to “0.”
12. Set the “High Performance” Power Option
When you are constantly going back and forth to your computer, I’m sure you’ve noticed that it starts to lag the more and more you run it from idle. This should be able to help with this problem.
- Access your control panel, click “System and Security>Power Options>High Performance” from the list.
or
- Just save your work and restart the PC if you have the time.
Our Advice
- Make sure you are taking all precautions to get the most of your investments in new hardware.
- Read the reviews
- Again, Spend Wisely.
- Proverbs 19:2
- Proverbs 14:29
- Luke 14:28-30
- Matthew 25:14-30
- Also if you need any assistance, we offer FREE consulting to help you. Feel free to contact us at (256) 415-6844 or use our form on the front page.